Setting up your DKP System in DKPSystem.com is an easy task. But before you begin doing this, it is strongly advised that you read Planning your Loot System to help you decide how you want to structure your system (point values, how to earn points, etc). Once this is done, you can proceed to actually set up your site.
Note: All of the instructions start from the Administration Menu.

The overall process, from "blank database" to first raid entered, should go as follows:
1) Create the DKP Systems for each system, if using more than one
2) Set up Decay (optional)
3) Make sure your ranks are properly set up
4) Create Characters
5) Create Destinations
6) Create Items
7) Record Items Received
8) Record a Raid Manually
9) Record a Raid using a GuildRaidSnapShot Mod
1) Create the DKP Systems for each system, if using more than one
Head down to the DKP System section of the admin menu.
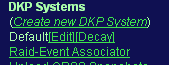
Every guild starts with "Default." If you don't have a need for more than one DKP System, you won't need to modify this. However, if you find a need for more than one System, you'll want them to have reasonably understandable names. Lets say you want to make one system for Molten Core, and one for Zul'Gurub. The first step is to rename the existing system.
Click on "Default" and it'll take you to a screen like this
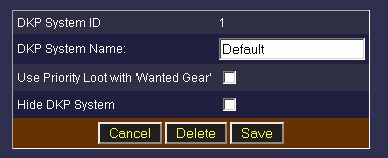
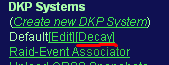
In the box for "DKP System Name", enter "Molten Core" and click "Save." You'll get a prompt for "System Saved" and taken back to the admin menu. Scroll back down to the DKP System area, and click on "Create a new DKP System on this Account."
Enter "Zul'Gurub" into the box for "DKP System Name" and click "Save" and you'll get the same prompt as before.
Congratulations, your first step is done!
2) Set up Decay (optional)
If you are going to utilize decay, head down the DKP System area, and you'll see a "Decay" section that looks like this:
For the systems with which you'd like to employ Decay, click on the [Decay] next to the name of the system. For this demonstration, we'll set up Molten Core to use Decay. So click on "Molten Core", and we'll be taken here:
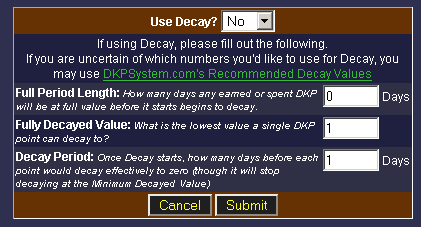
To enable Decay, choose "Yes" from the drop down box next to "Use Decay?" Now you have a number of variables to set up with the forumula here:
Full Period Length is the number of days that points will remain at full value before they begin to decay.
Fully Decayed Value is the absolute lowest a single point will decay to. This is in case you want points to always be worth SOMETHING, because they can and will eventually decay to zero if you don't set a minimum.
Decay Period is the number of days, after decay starts, that the system will attempt to bring the points down to zero. I say "attempt" because if you set a Fully Decayed Value above zero, it'll stop at that value.
If you click "DKPSystem.com's Recommended Decay Values," the following information will be entered
Full Period Length:: 45
Fully Decayed Value: 0.25
Decay Period: 100
Explained in simple terminology: All earned points will remain at full value for 45 days, after which point, they will begin to slowly decay toward zero. While, if we hadn't set up a "Fully Decayed Value" of 0.25, they WOULD decay to zero after 100 more days, the system stops it short. The way the formula works, it will stop it after around 90 or so days. So the total life-span of a DKP Point, from full value to minimum value, given this definition, will be around 135 days.
Once you are pleased with your Decay Configuration, go ahead and click "Submit" and your new Decay values will be in effect for the selected DKP System.
3) Make sure your ranks are properly set up
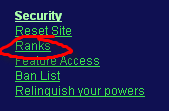
Some guilds like to give different point percentages to each rank. If this is the case, you'll want to head to "Ranks" under "General Setup" and set up your Ranks.
That interface is pretty straight forward, so I don't go into detail explaining it.
4) Create Characters
Obviously, you can't track points for character that don't exist, so you'll need to tell the system about your guild's characters. Hopefully, your members have saved you some of the trouble of creating the characters by clicking "Create a Character" in the "Login" menu. If not, it's a good idea to set up the characters, however, if you are going to use the GuildRaidSnapShot mod, it's actually optional, since the GRSS Import will create the characters as it goes.
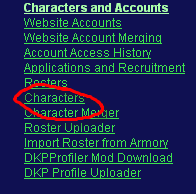
If you want to create the characters now, go ahead and click on "Characters" found under "Characters and Accounts" on the menu.
Which will take you to a page that looks like this
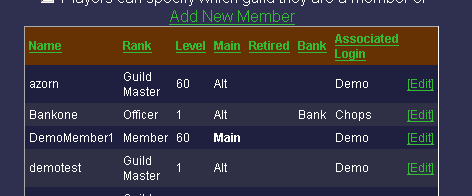
If you wish to create new characters, go ahead and click on "Add New Member" and follow the steps. It's fairly straightforward from this point.
5) Create Destinations
Now we can finally get into the meat of things here. We must now set up Destinations. Destinations are the locations that Raids in the DKP System that will be recorded and reported upon. For example, if you record points on a per-boss basis, it's a good idea to set up each boss. However, if you only record on a per-hour basis, for example, where it doesn't matter which bosses are killed or attempted, then you might just want to set up one Destination for the whole zone (so just "Molten Core" instead of "Molten Core - Lucifron", etc).
Head over to Destinations
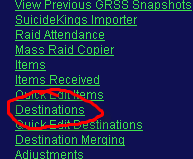
Here you're presented with two options "Initialize a WoW Zone" and "Add New Destination." If you wish to add a new Destination manually, you can do it by clicking "Add new Destination." This is the only method to create Raid destinations if they aren't already defined in a pre-initialized zone.
Usually, you'll use "Add new Destination" only to fill in the gaps that the Pre-initialized zones leave, and I'll describe the system using that approach.
Click "Initialize a WoW zone" and you'll get the following screen. From the drop down box, choose a WoW zone you wish to initialize, and in our case, I'll select Molten Core. I'm also going to say that MC will be worth 1 point per boss, except for Ragnaros, who will be worth 2. So I'll enter "1" into the "Default Points" box and click "Initialize."
You'll see that the new zone is created.
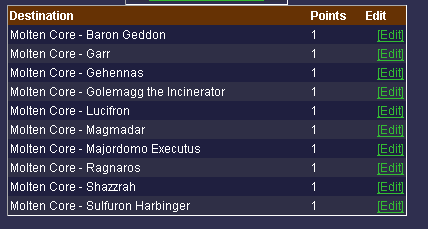
However, we wanted Ragnaros to be worth 2 points, so we find Ragnaros from the list, and click the [Edit] next to his name, taking us to the "Edit Destination" page. Go ahead and enter 2 into the "Default Points" field.
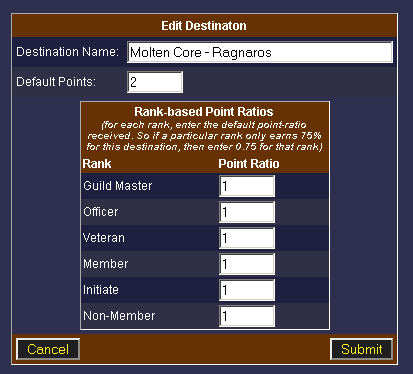
You might be asking yourself what the list of ranks is for. When we made sure to set up the ranks earlier, this is where they come in handy. Here you can define what percentage of points the different ranks will receive for each zone. For example, if we wanted initiates and non-members to received 50% points, you'd enter 0.5 into the boxes for each rank, as follows:
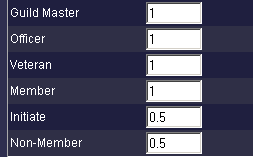
Once that is all set up (default points, and the point percentage per rank), click "Submit" and we can move on.
Lets say we also want to create a General Purpose "Molten Core" zone for non-boss reasons (Trash mobs, or whatever), we can click on "Add New Destination"
This is just like the screen we did for editing Ragnaros, and you can simply enter "Molten Core" into the box for "Destination Name," then give it the default points you wish assigned to it. If you leave the Rank boxes all blank, it'll assume 100%.
If a zone isn't in the list for initialization, don't worry, you can still create any Destinations you'd like. You can create a destination for the summoned Royals in Silithus, or you could make a Battleground a Destination and award points to members to attending.
If you are pure PvP guild, you could record only Battleground points, and use that to record victories and defeats by storing 1 for victory, and 0 for defeat.
Once you've done this process for all the Destinations, we can then move on.
6) Create Items
You can choose to create items before hand, or as they drop. I find it easiest to create items as they drop, as it results in less tedious data entry, however, you may want to pre-enter the items. In this section, I'll describe the method to create items before hand, and in then next section, I'll describe setting up items as they drop.
Head over to "Items"

which will take you to
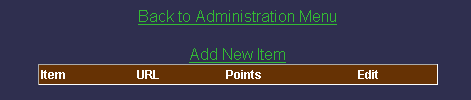
Click on "Add New Item," which will take you to
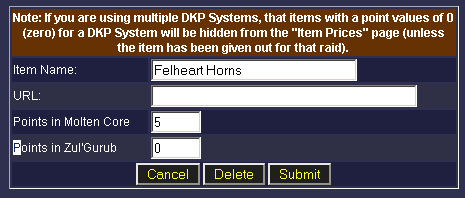
For "Item Name" simply enter the name of the item "e.g Felheart Shoulder Pads." For WoW guilds, you don't need to worry about entering a URL, as the item will automatically be linked, and for the Points, enter the default point value for each DKP System. So, in the case of our example here, you can enter the point value for Molten Core and Zul'Gurub. If you want the item to not show un the item list for that DKP System, enter 0 for the points.
When you are done, click "Submit", and the item will save and take you back to the item list, at which point, you can add more items.
7) Record Items Received
When items drop in-game, you'll obviously have to determine who should get the loot. If you are doing an auction system, you'll have to verify that the person bidding has the number of points that they are bidding. The best method with the current version of DKPSystem.com is to ALT+TAB over to the website after getting tells. That, or playing in windowed mode really helps with fast lookup. In either case, you'll want you check out your Current Standings on your website. After determining who gets the item, and sending it to them, you'll almost certainly want to enter the received item right away by heading over to the "Items Received" section of the Admin panel.

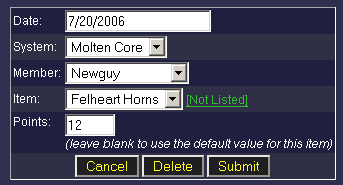
Click on "Add new Item Purchase"
If you are using more than one DKP System, select from which "System" this item was received. Select which character received the item, and select which item actually was received. And then enter the number of points this particular item cost the character (you don't need to specify the cost if the item was received for the default amount).
If the item doesn't actually appear in the Item list, simply click the [Not Listed] Link. This will change the Item drop-down-list into a form very similar to the "Edit Item" form (described in the previous section on this guide), thus enabling you to quickly create an item right on the fly here.
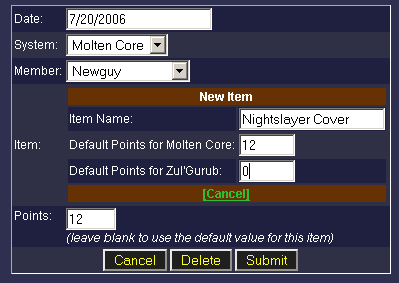
Enter the Item Name, and the Default points (also as described in the previous section).
Finally, remember to enter the number of Points this item cost.
8) Record a Raid Manually
While most raids will be recorded using the GuildRaidSnapShot Mod (GRSS), there will inevitably be times where you'll have to record one or more raids manually (if WoW crashes, or if you forget to take the snapshots, for example).
In this off-chance, one of the benefits of having the GRSS mod is that when it DOES take a snapshot, it also takes a screenshot of the raid. This feature was added in case WoW crashes, or you lose power or something equally devastating, you at least have a record of when snapshots were taken.
In any case, when recording raid attendance manually, simply head over to the "Raid Attendance" section.
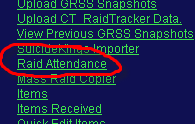
This will take you to:
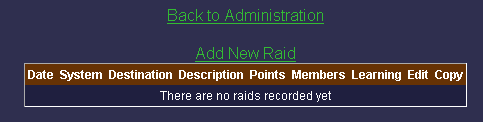
Click "Add New Raid" and you'll see this screen:
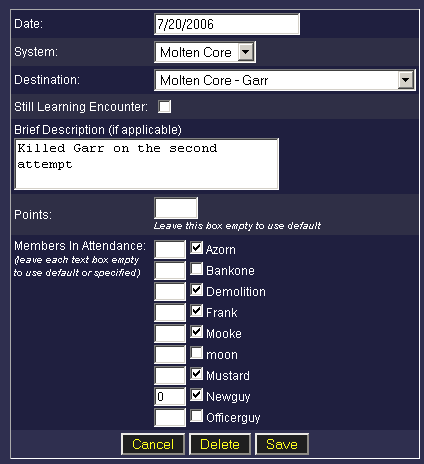
Enter the date of the raid (it defaults to "today"). Select for which system this is going to be. Select a destination, in this case, we've selected "Molten Core - Garr." If this is an encounter you want to consider a "learning encounter." I learning encounter is added to help guilds track which members attend the new stuff to help determine which members are there to help with advancement, and which members are really only there for the easy stuff and to get the loot. You can add a description of the encounter if you wish. Enter the number of points you wish this raid to be worth (if different from the default amount). Finally, is the list of members. Here you select which members were in attendance. To select an attendee, check the box next to their name. If you wish the default amount to be attributed to the attendee, simply leave the text box next to their name blank. If you need to override the default amount and provide a specific number of points for that specific attendee.
When you're all set, click "Save."
Now you can go ahead and check out the current standings, and you'll immediately see that the points have taken effect.
9) Record a Raid using a GuildRaidSnapShot Mod
This entire process is described in our article In-Game DKP Mod. |
|